Sunday, June 1, 2008

Land's End Trail / Coastal Trail wallpaper

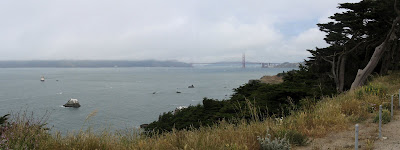
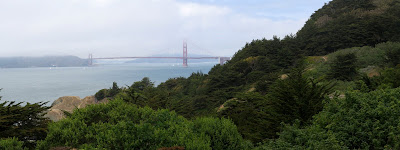
You don't need to get out the city for a nice, leisurely hike. The Land's End trail (part of the Coastal Trail), located in the Outer Richmond district of San Francisco, is as good as any beginner trail in the Bay Area. You get the bonus of some incredible views of the Golden Gate Bridge, access to beaches, beautiful trees, and more.

Here are two pairs of wallpapers from the Land's End Trail and Coastal trail. Both are available at both 3360x1050 and 3200x1200 and have a only a single stitch line placed directly at the monitor split.


Land's End Trail / Coastal Trail - very cloudy:

3360 x 1050:
3200 x 1200:


Land's End Trail / Coastal Trail - a little brighter:

3360 x 1050:
3200 x 1200:

Corona Heights Wallpaper

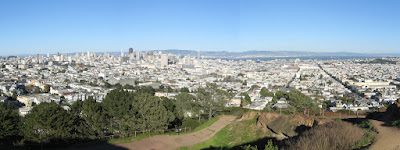
For one of the best views of downtown San Francisco, The Castro, The Mission, and the San Francisco Bay you must visit the peak of Corona Heights Park. Locals love it for the playgrounds, the dog walk area, and the tennis courts, but the view is what it's all about. There are even comfortable places to sit.

Here are four pairs of wallpapers from the beautiful peak. All are available at both 3360x1050 and 3200x1200.


Corona Heights Park - Downtown and East:

3360 x 1050:
3200 x 1200:


Corona Heights Park - Downtown:

3360 x 1050:
3200 x 1200:


Corona Heights Park - Downtown zoom:

3360 x 1050:
3200 x 1200:


Corona Heights Park - Souteast:

3360 x 1050:
3200 x 1200:

Monday, March 31, 2008

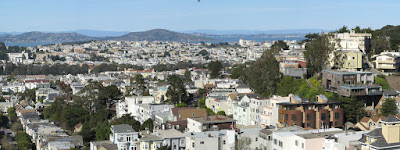
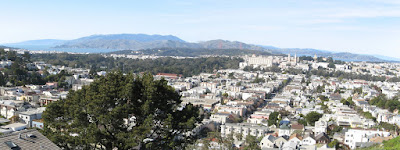
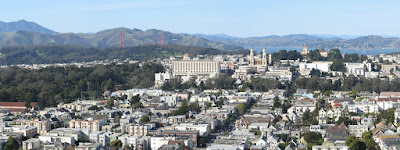
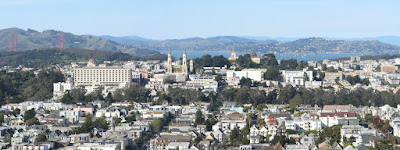
Tank Hill Wallpaper

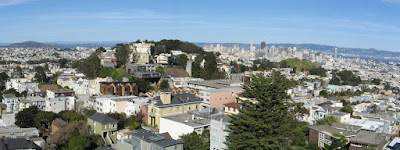
Located at geographic center of San Francisco, Tank Hill boasts an incredible 270+ degree view of the city. While the tourists go all the way to the top of Twin Peaks, the locals know the view is just as good from 1/2 mile away.


Here are five pairs of wallpapers from the beautiful peak. All are available at both 3360x1050 and 3200x1200.


Standing on Tank Hill looking downtown:

3360 x 1050:
3200 x 1200:


Standing on Tank Hill, looking Northeast (just North of downtown):

3360 x 1050:
3200 x 1200:


Standing on Tank Hill, looking North:

3360 x 1050:
3200 x 1200:


Standing on Tank Hill, looking North (zoom #1):
3360 x 1050:
3200 x 1200:


Standing on Tank Hill, looking North (zoom #2):
3360 x 1050:
3200 x 1200:


Here's one more facing East (3360x1050 only):


And one last shot facing Northeast with the stitch placed directly on the monitor split (3360x1050 only):


Marin Headlands Wallpaper

One of the best bike rides in San Francisco is across the Golden Gate Bridge and to the top of the Marin Headlands via Conzelman Rd. When you get to the top, you are rewarded with an amazing view of the city. Here are four different 3360 x 1050 pictures from a ride back in February '07:


This first one (above) is my favorite, but it isn't the best stitch, so I've placed the stitch line right between the two monitors. Here are a couple more.


And here are two at 3200 x 1200:


Conservatory of Flowers Wallpaper

One of the nicest places to kick back in San Francisco is on the lawn in front of the Conservatory of Flowers in Golden Gate Park.


Here's a lovely wallpaper available in two multi-monitor sizes:


3360 x 1050:
3200 x 1200:

Saturday, March 29, 2008

sfdesktop FAQ

Q: Can I use this wallpaper with a single monitor?
A: You can, but you'll need to crop it and scale it down. Please see this article for info on scaling, cropping, aspect ratios, etc.


Q: Will you ever support other monitor sizes?
A: Right now, I'm primary focusing on 3360x1050 since this seems like the most common setup (and it's what I have!) You'll see some at 3200x1200 and even some at 2560x1024, but not too many. No other sizes are supported at this time.


Q: Can I request a specific SF wallpaper?
A: Sure! Just drop me a line and I'll see what I can do. My email is at the bottom of this FAQ.


Q: I have a cool San Francisco scene... can you post it here?
A: If it's already 3360x1050, just shoot it to me in e-mail and if I like it I'll post it (and give you photo credit too.)
If it's a different size, please prepare a version at 3360x1050 and blip it over.


Q: Will you ever do more than just San Francisco scenes?
A: San Francisco is the main focus, but from time to time I'll post other stuff if I can get a good stitch. For example, I'll be adding an entry from Grand/Bryce/Zion Canyons as well as one from Lake Tahoe shortly.


Q: What if I have two monitors that aren't at the same resolution? Will this still work?
A: The answer to this question gets complicated (and is different on PC vs. MAC) but I'll eventually write a detailed answer here. In the meantime, see Will Smith's MaximumPC article.


Q: I want to do this for another city, can I?
A: Sure! Why not? Once you do, drop me a line and let's talk about setting up a blog ring.


Q: What are some other cool multi-monitor wallpaper sites?
A: Here are a few. When I find new ones, I'll add them. If you have one in mind, comment here and I'll add it.
  • widewall is a cool blog with 3360x1050 wallpapers of weird images
  • social wallpapering is a cool social network where the community can rank and distribute hi res wallpaper. There's a dual monitor section, but I don't see 3360x1050 as a supported size.
  • drollthings.com has a couple 3200x1200 and 2560x1024 wallpapers
  • This site at Princeton has a bunch of 2560x1024 images.
Got more? Comment here and I'll add them.


Q: Are your original images or source stitches available?
A: Not right now. If you're interested in one, drop me a line, and I'll see what I can do.


Q: Do you accept donations?
A: Workin' on it :)


Q: How do I get in touch with you?
A: Drop me a line here: jg [at] johngreene {dot} org

Monday, March 10, 2008

How to scale and crop images

How to scale and crop

Scaling and cropping an image just right is an art form. This post is intended to give you a few simple dos, don'ts, and tips related to scaling and cropping images: for multi-monitor wallpaper or otherwise. Just about any photo editing software (e.g. Photoshop, Paintshop Pro, GIMP) will let you scale and crop images. This post assumes you have one of these programs and are reasonably familiar with how to use it.


As a simple example, I'll show you how to take one of my 3200x1200 multi-monitor wallpaper images and use it to create a nice single monitor 1280x1024 wallpaper. The same technique could be used for any image size as long as the final image is less than 3200 pixels wide and 1200 pixels high. This brings us do the first "don't":


Don't ever scale your image "up." That is, never scale your image to be bigger than the original -- always smaller. When you scale down, the scaling algorithm can discard unneeded parts of the image and can smooth out the rough spots, but scaling up just doesn't work since the software would require more detail than the image actually has. Your software will let you do it, but it won't look good. As an example, see these three images below.


The first is a 160x120 snippet of a flower. In the second, I've reduced it to 80x60. It's smaller, but look closely: it still looks good. Next I took the 80x60 version and scaled it back "up" to 160x120. Notice how all the detail in the third image is gone. That's because the detail just isn't there in the 80x60 version.


OK, now that we've gotten that out of the way, follow these steps in order for best results:


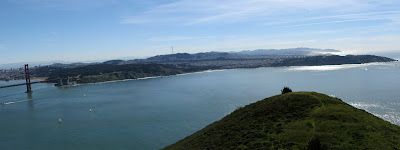
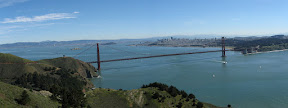
1) Acquire your source image and make it's big enough for what you want to do. Click the image below to download a 3200x1200 version of the Golden Gate bridge as seen from the Marin Headlands:


2) Load the image in your image editing software. In this case, I'll use Photoshop.
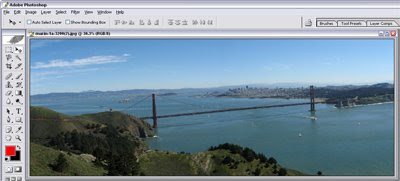


3) Choose the Selection Tool and set the aspect ratio to 5:4 since 1280x1024 is 5:4.


4) Select a good region as shown below. Nope, you're not gonna get the whole bridge at 5:4.
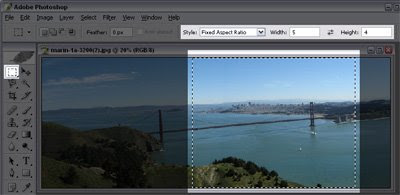


5) When you're happy with your selection, copy it, and paste it into a new document. In Photoshop, you can just do: ctrl-c, ctrl-n, return, ctrl-v to: copy, make a new document, and paste.
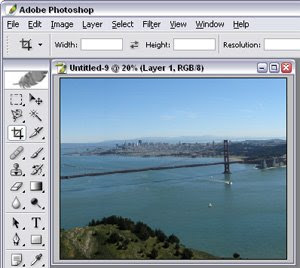


6) If you want to do any image processing (like play with the levels, etc.) now's the time.

7) Now scale the image to its final size. In Photoshop, just select "Image Size..." from the Image Menu and enter 1280 for the width. The height will automatically change to 1024. Don't worry about the document size or the resolution.
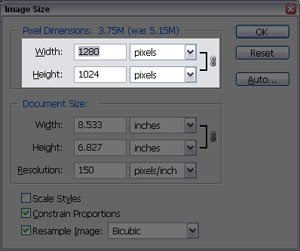


8) If you want to do any post-processing effects (like a mild "Sharpen"), now is the time. I used to be into sharpening images after I reduced them, but now I think it makes it look too artificial.

9) OK! You're done. Do File -> Save as... and save as a .jpg with best quality. Your image is ready to use for your wallpaper. Here's the final product:
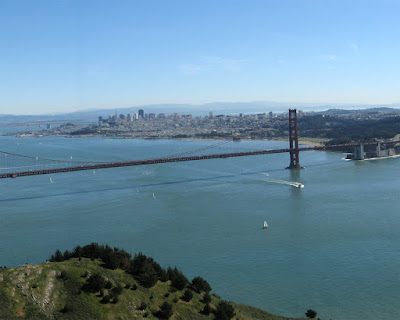


Yes, if you just want to download the 1280x1024 version without going through all that work, you can click the image above and use it for your 1280x1024 wallpaper. Enjoy. :)


A final note on aspect ratios: when cropping and scaling images for wallpaper, make sure your image is the proper size and aspect ratio. You can calculate the aspect ratio by dividing the width by height and representing the quotient in fractional form. For example, 1280/1024 = 1.25 or 5:4. Here are the common single monitor aspect ratios:
  • 1680x1050 = 8:5
  • 1600x1200 = 4:3
  • 1280x1024 = 5:4
Here are the common dual monitor aspect ratios:
  • Two 1680x1050 monitors = 3360x1050 = 16:5
  • Two 1600x1200 monitors = 3200x1200 = 8:3
  • Two 1280x1024 monitors = 2560x1024 = 5:2


-sf desktop guy

Saturday, March 8, 2008

How to stitch for multi-monitor wallpaper

How Stitching Works

Most Canon Digital Cameras, like my Powershot A700 come with a stitch assist shooting mode:


Canon also supplies stitch assist software (Photostitch) which makes it really simple to combine images to create amazing panoramic pictures as shown here:


The software does a great job lining up your pictures, but if you need to edit/tweak the seams, you can do that too.


A tripod helps but isn't needed to get started. In fact, all wallpapers on this website were taken without a tripod. If I can do it, you can do it!


Why Stitch?

With 8 megapixel cameras getting cheaper and cheaper, a question arises... why stitch at all? After all, an 8 megapixel image is 3504 pixels wide -- making it large enough to crop a 3360x1050 slice. To me, though, it's all about framing and resolution. 3504 doesn't give you much room to scale down, and a crop of a single 8 megapixel shot makes it hard to frame. In this example, the highlighted area of this picture is 16:5 (the aspect ratio for 1680x1050) while the source picture is roughly 3:2.


Two (or even three) stitched 6 megapixel shots gives you a little more room to work with: approximately 4600 pixels for two and 6200 for three. A 3360x1050 scaled-down and crop of two stitched 6 megapixel shots looks like this:


As you can see, the aspect ratio of the stitched image is closer to the final image which is linked below:


One trick is to place the stitch-line at the center of the image when you crop so that it is split between the monitors. Even though the stitch on the above image isn't very good, it's not noticeable at all when placed across two 1680x1050 monitors.


When consumer cameras are in the 12 megapixel range, one shot will probably do it, but by then, your monitors will probably be at 2400x1500. :)


Additional info

Ken Rockwell has a bunch of good info about stitching with a Canon camera here. If you know of additional reference sites, comment here, and I'll hook up the links.

Wednesday, March 5, 2008

How to use multi-monitor wallpaper

If you have two monitors that are the same size, using wallpapers from sfdesktop is a piece of cake. In this "how to" article I'll take you through how to use a 3360x1050 image on two standard 1680x1050 monitors on Windows XP.

Right-click on your desktop, choose Properties, then click the Settings tab to see your monitor setup. In this example, I have my primary monitor on the left and my desktop extended onto the secondary display. Both monitors are at 1680x1050 resolution.


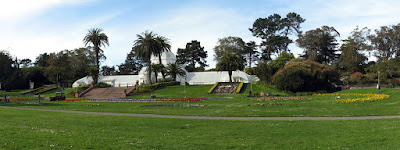
Now that you're ready, let's get a source image. This is a 3360x1050 stitch of the Conservatory of Flowers at Golden Gate Park.


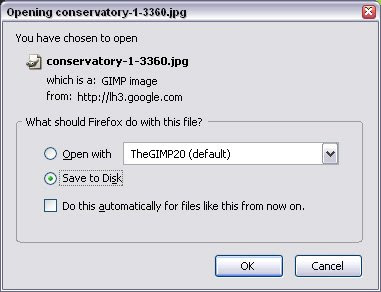
Click on the image above and you'll be prompted to save it to your desktop: (firefox save box shown):


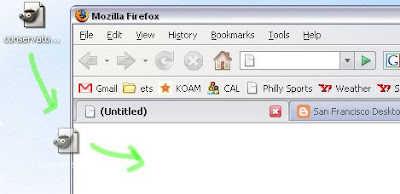
Next, prepare a blank tab on your broswer, and drag the saved image from your desktop to your browser:


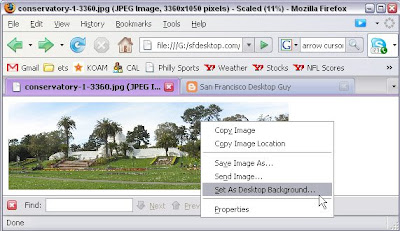
Now right-click on the reduced image in your browser and choose "Set as desktop background..."


In the ensuing dialog box, select "Tile" from the Position menu. You may be used to tile taking a small image and duplicating it across your desktop. The key here is that tile also takes your big image and properly maps it across both monitors.


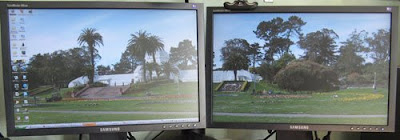
When you're done, you'll have a desktop that looks something like this:


That's it!


Notes:

  • if your monitors are different sizes, check out this MaximumPC article on how to make a multi-monitor compatible wallpaper
  • if you're on a Mac... (TBD)